
Blog Layout
Cookiecutter.com Ramblings
Making memories one cookie at a time!
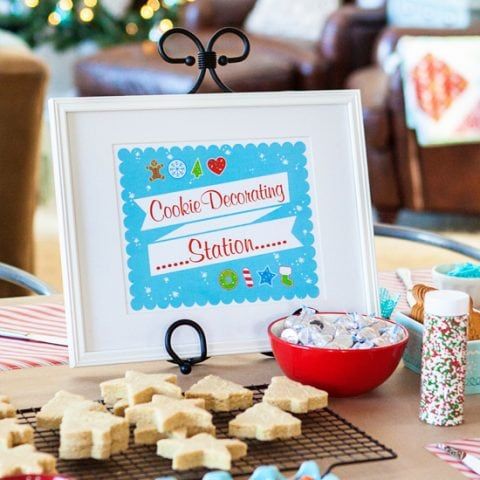
Cookie decorating station at your next birthday party.
Tammy • Mar 02, 2015
Give a table full of kids a few cookies, some sugary decorations and see what they come up with.
In today's blog, I will give you all the steps you need to create a cookie decorating station that will be a fun
and memorable
activity at your sweet little person's next birthday party. Wait a minute you say! Kids and decorating cookies? Yes, you heard me right :) Do you want to be known as the coolest Mom or Dad among your kid's friends? Then trust me and do this. You will not only hit a home run with your own kid, but with each kid that comes to the party. Basically you will have hit a Grand Slam!
Here is a list of supplies
that you will need to gather for the party:
- Bakery boxes- to put finished cookies in to send home. Check at your local bakery or go to Amazon here. These require some assembly, but you can do it! These are cupcake boxes, so watch your cookie size if you go this route.
- Butcher paper or plastic table clothes to cover your tables with. You'll thank me later :)
- Cookie cutters- either go with birthday theme or pick a few of your favorites here. Remember to watch the size of the cookie that you make, so they will fit in your cute bakery boxes.
- Make up about 3 dozen sugar cookies the day before. Find my favorite recipe here. Depending on how many kids you have coming to your party, you will want at least 3 cookies per kid, plus a few extra in case one breaks.
- Pre-made royal icing. Find my favorite recipe here. If you want to have a couple of different colors to use, you will love this Americolor Soft Gel here. Perhaps you are not all in on this part; just buy some good ole Betty Crocker tubs of frosting at the grocery store and set out plastic knives for them to spread frosting on. No judging here :)
- Decorating squeeze bottles are so handy and easy to use for these kid parties. You may have some at home already, or you can find them here. If you feel really brave and want to hit not only a home run, but a grand slam, get some decorating bags all filled up. Your call. With those, you will need tips and couplers.
- Decorating supplies- Here are a few options. Sanding sugar, Candy Confetti, Edible Glitter. Mini chocolate chips, M&M's, Candy eyeballs from Amazon here. I know I've left some ideas out, think fun!
- Wax paper in case you need it when sending cookies home.
- Toothpicks to use as decorating tools- very useful to help marble. See a great marbling video by @sweetopia here. She will inspire you!
Now on to the Party!
Set up your cookie stations
around your table. Put a plate of 3 or so cookies
at each station. A variety of decorating supplies(Egg Cartons with top torn off are great for this), bottles of icing
or little bowls of frosting- whichever way you decide to go. A note card
or something with the decorator's name on it. They WILL want to take their own cookies home.
Oh, you might want to monitor
how many layers of icing they put on. Might be good to show them all how to outline their cookie, then go in and fill in the blanks. My experience has been some young decorators will pile on the icing about 2 inches thick, then put another 2 inches of sanding sugar on. Original, but when they get home, that cookie will probably go in the trash :) Have them repeat the phrase, "Less is better." Or maybe not?
When all the decorators are done with their creations, now is a great time to have some kind of game planned, or time to open presents, or eat one of their cookies! The goal is to get them away from the cookie stations while the creations dry- about 30-45 minutes. That way when it is time to send them out the door, the cookies will be dry and you can box them up in the cute bakery boxes, with their name on top.
Clean Up~Remember the 2nd supply listed above? The butcher paper or plastic table cloth? Well, it's time to take all the containers off and roll that up and pop it into the trash can. Yes, that is the best part of clean up. When you simply roll it up and give it a toss.
Congratulations!
You have just made some lovely lasting memories with every kid at the birthday party! You have hit a Grand Slam. Now you will be known as THE coolest Mom or Dad in your town ;)
Time to sit back and relax. You did awesome! 364 more days till you can do it again. Unless you have additional kids. Then you are just warmed up perfect!
Let me know if you have any questions. I love to help solve any kind of cookie problem.
~Tammy
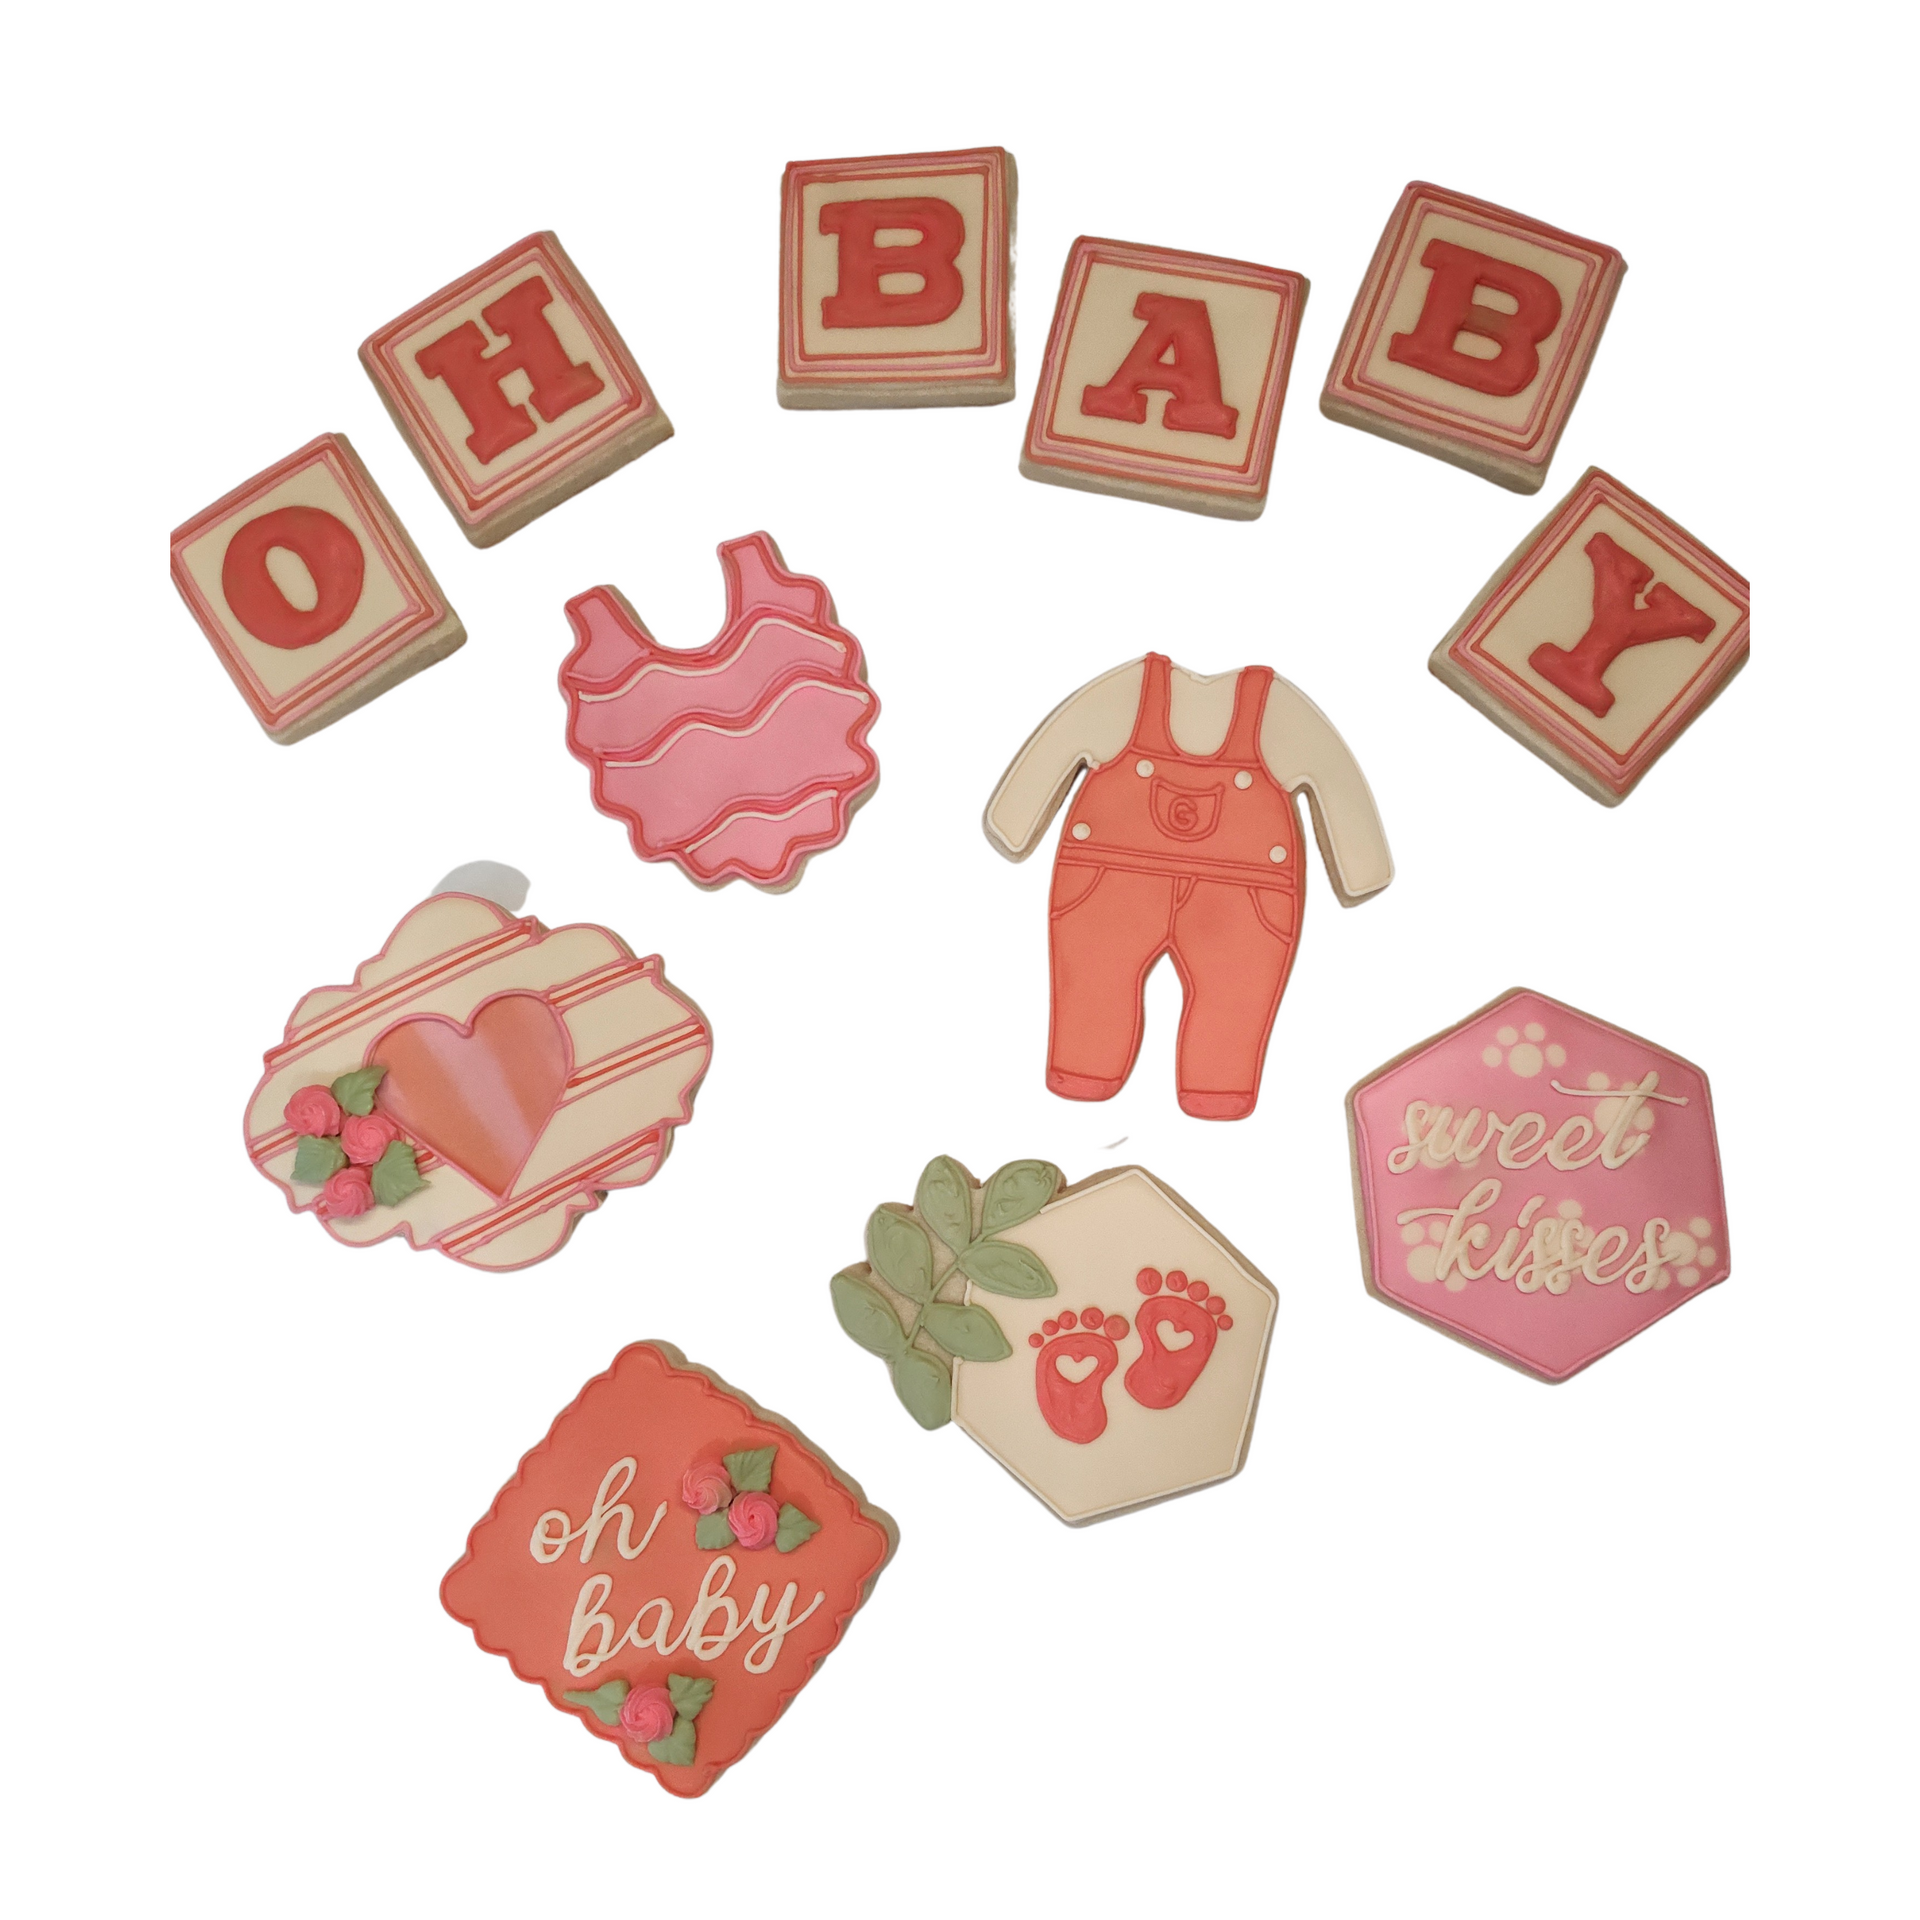
What's cuter than baby shower cookies?

This tells the story on how we began selling cookie cutters.
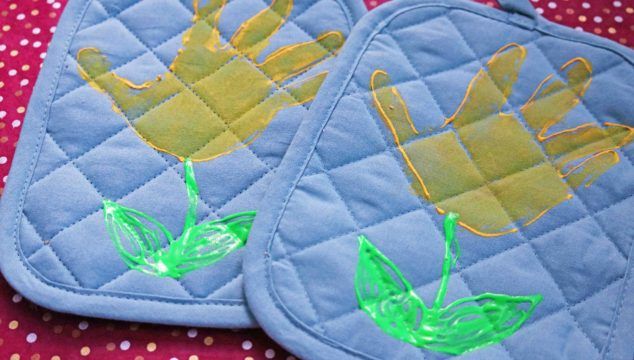
Dear Cookie Friends: Hello! I hope everyone is staying warm, especially if you are experiencing the winter weather as we are here in the Midwest. As December speeds along, that usually means the school aged children will soon be out of school for a few weeks. Trapped inside the warm comforts of your house without any signs of homework means lots and lots of, "Mom, I'm bored!" To avoid hearing this statement from your children, it is nice to come up with some activities to keep those kiddos preoccupied. At least that is what happened at our house during those years that now seem so far away! That sounds like a song, doesn't it? Hand Print or Designer Potholder This first activity would work great for pre-school through elementary school aged children. If you are needing a quick sentimental gift for someone, this fits the bill perfectly! Our church made these adorable potholders this December to give all the preschool families. The best part was, it was the kind of gift that will forever have a memory attached to it, since each preschooler individually crafted them with their own precious fingerprints! As a mom, I have always loved those kinds of gifts! And to finish it off, the pre-school teachers then attached a snowflake cookie cutter to the potholder. Here are the supplies you will need: 1. Potholder (Dollar Store) 2. Acrylic paints, as many colors as you want to use (craft store) 3. Slick puff paint if you want to write a name at top of potholder (craft store) 4. Small foam brush (craft store) 5. Fingers or the whole hand to make print (your house) 6. Newspaper to put down on the table as you work on the project 7. Baby wipes for hands or feet after done with each print Directions: 1. First, if your potholder has a little loop on it, be sure to put it on the top in case the person who receives the gift wants to hang it. Paint the hand (or foot) using the foam brush, then press on the pot holder. You will use less paint, get the paint on evenly, and experience less of a mess by doing it this way. If you are quick, you can get a couple of prints done before you should wipe off the paint. Cleaning the is not too bad as long as you don't leave it on for too long. After paint is on the hand, take the hand, press down nice and firm, then lift straight up. Let that dry just a bit and then you can go back and write the name and age, or whatever you like. Be sure to leave the pot holder flat to dry. A cute, personal and inexpensive gift to give grandma! You can even attach a cookie cutter to finish it off! Find the snowflakes here.

